
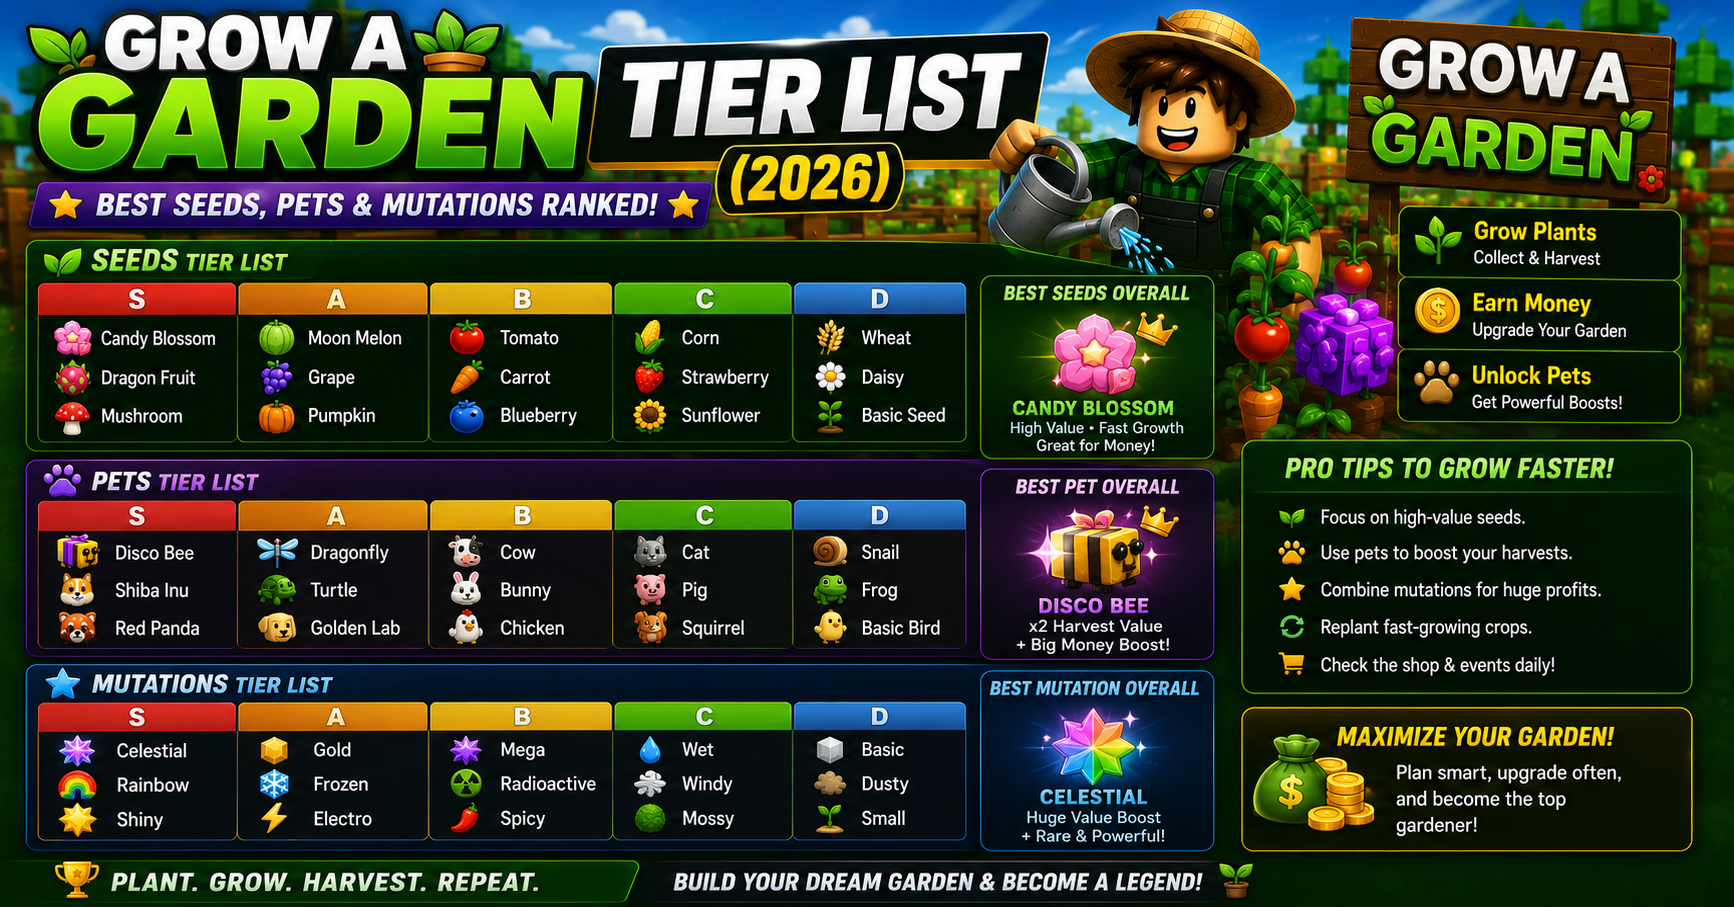
Let's be honest: half the seeds in Grow a Garden are a waste of water. You plant them with high hopes, wait two minutes, and harvest a handful of coins that wouldn't buy a twig. Meanwhile, your neighbor's plot is exploding with glittering Crystal Lilies, and they've got a pet Rainbow Shroom casually dropping Legendary seed packets like it's a Monday. The difference? They know what's actually good, and they ruthlessly ignore everything that isn't.
That's exactly what a tier list is for. This Grow a Garden tier list ranks every seed, pet, and mutation in the game based on profitability, growth time, mutation potential, and synergy with other garden elements. I've logged hundreds of harvest cycles, tracked spawn rates, and calculated coins-per-minute for every plant in the game. No theorycrafting, no "this feels good"—just cold, hard dirt-under-the-fingernails data. Whether you're a beginner trying to escape the early game or a veteran optimizing your Prismatic Rose farm, this ranking will tell you exactly what to plant, what to hatch, and what to chase. Let's dig in.
How This Grow a Garden Tier List Works
Every seed, pet, and mutation is placed into one of five tiers based on their overall value to your garden. Value is calculated using a mix of coin generation rate, rarity, mutation potential, utility, and the "synergy factor" with other high-tier items.
- S-Tier (Godly): The absolute best. Build your entire garden around these. They warp the game's economy.
- A-Tier (Excellent): Fantastic performers that will carry you through the mid-game and remain relevant in the endgame.
- B-Tier (Good): Solid choices. Not game-breaking, but reliable and worth the space if you can't get S/A-tier items yet.
- C-Tier (Average): Niche uses. You'll plant these when you're completing quests or just starting out. Swap them out as soon as possible.
- D-Tier (Garbage): Actively wastes your time and plot space. Avoid at all costs unless you're a completionist.
Seed Tier List: What to Plant in 2026
Seeds are the engine of your income. Planting the right ones can multiply your earnings tenfold; planting the wrong ones turns your garden into a ghost town. Here's the definitive best seeds Grow a Garden ranking.
| Tier | Seed | Rarity | Coins/Minute | Why It's Ranked Here |
|---|---|---|---|---|
| S | Golden Rose | Legendary | 2,400+ | The king. High base sell price and mutates into the Prismatic Rose for 50x profit. The core of every endgame farm. |
| S | Void Orchid | Legendary | 1,800+ | Attracts rare shadow pets while blooming, effectively generating coins and passive pet value. Insane late-game utility. |
| A | Moon Lily | Epic | 950 | Reliable 10x mutation into Crystal Lily. Easy to farm and a critical stepping stone to Legendary seeds. |
| A | Inferno Bloom | Epic | 1,100 | Only available during heatwaves, but its mutation multiplies earnings 8x with very little setup. Worth stocking weather-specific seeds for. |
| B | Sunflower | Rare | 400 | The mid-game workhorse. No mutation, but fast cycle time makes it a steady income source while you hunt for Epics. |
| B | Shadow Shroom | Rare | 350 | Mutations into Phantom Cap for 12x sell price. Requires nighttime planting, which limits consistency, but strong when timed well. |
| C | Bluebell | Uncommon | 120 | Your first real money-maker in the early game. Outclassed quickly once you unlock Sunflowers. |
| C | Firebloom | Epic | 600 | Fast growth for an Epic, but zero mutation potential. Outperformed by Moon Lily in almost every scenario. |
| D | Daisy | Common | 40 | Tutorial-tier. Only plant these to complete early quests or grind XP in a pinch. Never a long-term option. |
| D | Tulip | Common | 35 | Pretty, but utterly useless for profit. A cosmetic trap. |
Pet Tier List: The Best Companions for Your Garden
Pets automate labor and multiply your yields. The right pet setup can literally double your coins per hour. Here's how the best pets Grow a Garden stack up.
| Tier | Pet | Rarity | Effect | Ranking Reason |
|---|---|---|---|---|
| S | Rainbow Shroom | Legendary | Spawns free Legendary seed packets | Passively prints money. A single Rainbow Shroom can replace your entire active planting cycle. The holy grail. |
| S | Phoenix Chick | Legendary | Prevents plant wilting in radius | Negates the punishment for missing water cycles. Essential for massive 9x9 plots with high-maintenance crops. |
| A | Garden Gnome | Uncommon | +5% mutation chance (3x3 aura) | Directly boosts the most profitable mechanic in the game. Stack multiple Gnomes around Golden Rose grids for multiplicative odds. |
| A | Fairy Dragon | Rare | Instantly grows a random seed every 4 minutes | Incredible burst value. Drops a fully grown plant out of nowhere, often a high-rarity one if placed near your best plots. |
| B | Sproutling | Uncommon | Auto-collects harvested plants | Saves immense manual labor. Pairs perfectly with staggered planting strategies. Not flashy, but irreplaceable for efficiency. |
| B | Crystal Snail | Rare | Doubles next harvest value on its trail | Micro-managing its path can spike profits dramatically. High skill ceiling, but worth learning. |
| C | Ladybug | Common | +10% growth speed (adjacent) | Nice early-game speed boost. Stack them around Moon Lilies to reach mutation windows faster. |
| C | Hummingbird | Uncommon | Visits flowers to speed growth | Mobile Ladybug. Less consistent because its path is random, but covers more area. |
| D | Earthworm | Common | Waters one random dry plant every 30s | Replaced entirely by a second watering can. Too slow and unreliable for serious gardens. |
| D | Bumblebee | Common | +5% coin yield (nearby) | The bonus is negligible. Spend your egg coins on literally anything else. |
Mutation Tier List: Rarest and Most Profitable Variants
Mutations are the lottery tickets of Grow a Garden. The best ones sell for 50x the base plant price. Here's the mutations tier list based on profit multiplier and difficulty.
| Tier | Mutation | Base Plant | Multiplier | Difficulty |
|---|---|---|---|---|
| S | Prismatic Rose | Golden Rose | 50x | Hard (requires 3x3 grid, 25% chance) |
| S | Phantom Cap | Shadow Shroom | 12x | Medium (nighttime only, no early water) |
| A | Crystal Lily | Moon Lily | 10x | Easy (near water, water quickly) |
| A | Inferno Bloom | Firebloom | 8x | Medium (requires heatwave event) |
| B | Fizzberry | Bubble Berry | 6x | Medium (friend must water it) |
| C | Glowshroom | Common Shroom | 3x | Easy (any nighttime harvest) |
The Ultimate Garden Synergy Build (S-Tier Meta)
If you want the absolute most efficient garden in the current meta, here's the blueprint. Unlock a 9x9 plot. Fill six of the central grids with 3x3 Golden Rose formations, leaving a one-tile gap between each grid. Place a Garden Gnome in every gap. Surround the outer edge with Moon Lilies next to the river tiles for easy Crystal Lily mutations. Keep two Phoenix Chicks patrolling to prevent any wilting. Hatch eggs until you get a Rainbow Shroom and place it in the center of everything. This setup maximizes Prismatic Rose mutation odds, ensures continuous Crystal Lily income, and passively generates free Legendary seeds from the Rainbow Shroom. It's not cheap to build, but once running, it outputs millions of coins per hour with minimal input. This is the garden that separates the veterans from the hobbyists.
Bookmark This Tier List Before You Plant Another Seed
The wrong seed choice can set you back hours of progress, but the right one—paired with the right pet and mutation strategy—turns your garden into a botanical gold mine. This Grow a Garden tier list is your cheat sheet. Refer to it when you're staring at the shop wondering what to buy next. Focus your resources on S and A-tier items, ruthlessly cull the D-tier distractions, and watch your garden transform from a dirt patch into a legend. Happy planting, and may your next Golden Rose grid birth a Prismatic.